LIFEPO4 Batteries

LiFePO4 Battery Upgrades

Are Lithium Batteries Worth the Cost?

One of the most common questions I get is:

“Are lithium batteries really worth the extra cost?”

My answer is simple:

Yes. Absolutely worth every penny—if those pennies are spent wisely.


Understanding the Difference

Not all batteries are created equal. The most common comparison is between traditional lead-based batteries—such as SLA (sealed lead acid) and AGM—and modern Lithium Iron Phosphate (LiFePO4) batteries.

While lead-acid batteries have been around for decades and may appear cheaper upfront, they come with significant limitations that often make them more expensive over time.

LiFePO4 batteries, on the other hand, represent a major leap forward in energy storage technology.


Usable Power: What You Actually Get

One of the biggest differences is usable capacity.

With lead-acid batteries, you typically can only use about 50% of the rated capacity without damaging the battery. That means a 100Ah battery really only gives you about 50Ah of usable energy.

LiFePO4 batteries allow you to use 80–100% of their capacity safely and consistently.

So right away, you’re getting nearly double the usable power from a lithium battery of the same size.


Lifespan: The Real Cost Factor

This is where lithium truly separates itself.

Lead-acid batteries typically last:

  • 300–500 charge cycles (AGM)
  • Even less if frequently discharged deeply

LiFePO4 batteries commonly last:

  • 3,000–5,000+ charge cycles

That’s not a small difference—that’s multiple times the lifespan.

What this means in real terms is simple: you may replace lead-acid batteries several times before a lithium battery even begins to show wear.


Maintenance and Reliability

Lead-acid systems require ongoing attention:

  • Monitoring charge levels
  • Avoiding deep discharge
  • Managing voltage drop
  • Dealing with sulfation over time

LiFePO4 batteries are essentially maintenance-free.

They provide:

  • Stable voltage output
  • Consistent performance
  • No sulfation issues
  • No regular maintenance requirements

They simply work—and keep working.


Weight and Efficiency

Another major advantage is weight.

LiFePO4 batteries are significantly lighter than lead-acid batteries with the same capacity. This is especially important in mobile applications like RVs, vans, and boats where weight directly impacts performance and efficiency.

They are also more efficient:

  • Faster charging
  • Less energy lost during use
  • Better performance under load

Upfront Cost vs Long-Term Value

This is where most people hesitate.

Yes—lithium batteries cost more upfront.

But when you factor in:

  • Longer lifespan
  • Higher usable capacity
  • No maintenance
  • Fewer replacements

They are often the cheapest option over time.

In other words, you’re not just buying a battery—you’re buying years of reliable performance.


Where Lithium Makes the Most Sense

LiFePO4 batteries are especially valuable for:

  • Off-grid systems
  • RV and van life setups
  • Marine applications
  • Backup power systems

Anywhere you rely on stored energy daily, lithium quickly proves its value.


The Bottom Line

Are lithium batteries worth the cost?

Yes—if you’re looking at the full picture.

They provide:

  • More usable power
  • Longer lifespan
  • Greater reliability
  • Lower long-term cost

Lead-acid batteries may seem cheaper at first, but they often cost more in the long run—both financially and in system performance.


Final Thought

If you’re building a system you can depend on, lithium isn’t just an upgrade—it’s the foundation.

Spend wisely upfront, and you’ll avoid replacing, upgrading, and troubleshooting later.

In the world of off-grid power, that’s where the real value is.

Just recently, I met a neighbor that had a new 38′ 5th wheel. He ordered it with a stock 100AH Lead Acid Battery and no generator.  He only went from RV park to RV park, with full hookups, so his logic was that he never needed an independent power system… UNTIL..

The last RV park had a 3 day power failure. His 100AH lead acid battery only lasted half a day due to his loads and residential refrigerator. Now, since the 5th Wheel was unhooked from his tow vehicle, it was up on it’s electric jacks. He could not lower the RV jacks to hook up and leave. So he had to spend three days until the power was restored and his battery was charged back up.

After 3 days and throwing all his refridgerated food away, he could charge his lead acid for a few hours and finally leave.

I ran into him and heard his story. I proposed a moderate solar system with Lithium Batteries, and he agreed. He is now power independent. His residential refrigerator, freezer and ice maker run 24/7 with no issues. He can charge every day or be on shore power. He now splits his time between RV parks and Boondocking.

I have field tested these prismatic cells for over two years. They work flawlessly and can handle extreme discharges, but, I recommend using conservative charge and discharge profiles, which can be set by most quality Solar Charge Controllers and Inverter/Chargers. This will insure your batteries last for years and over a decade is not uncommon for LIFEPO4 Battery packs.

3.2 Volt, 280 Amp Hour Cells

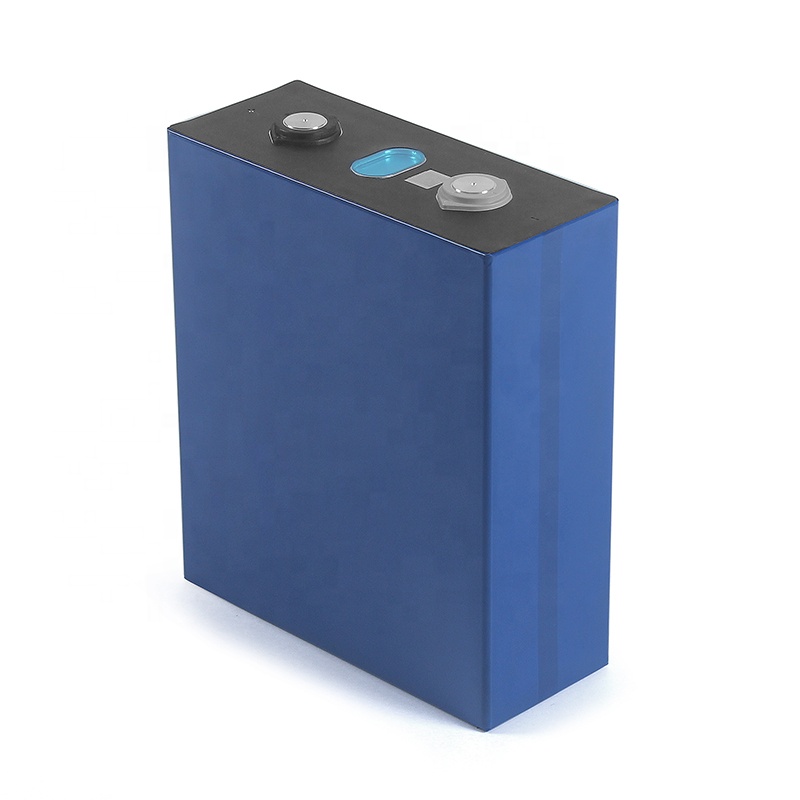
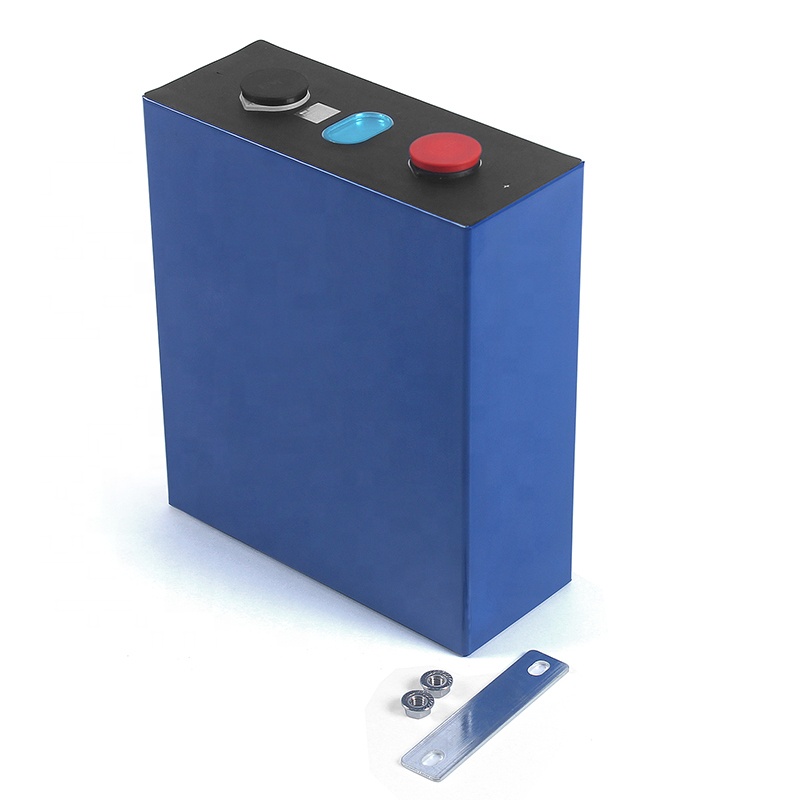
4 Cells make up the replacement of a typical 12V battery in voltage and approximate size. The main differences are:

  • One of these 280 AH packs is the equivalent of Five typical 100 Amp Hour Lead Acid or AGM Batteries.
  • Conservative methods of Charge to 90% and discharge to 20-50% will make them last ten or more years.
  • Rated at 3500+ Charge and Discharge cycles. One cycle a day would equal about ten years. We expect longer life than that.
  • Mantanance is not required.  Not fluids to add.
  • 1/3 the weight of the same physical size Lead Acid or AGM.
  • Compartment venting is not required. No vapor discharges.
  • Can be mounted in any position.
  • Tremendous Cost Savings over life cycles and power delivery.

Here is a recent build a customer sent in.

Insights on New Installations

Rooftop Solar Panels

How Much Solar Do You Really Need?

One of the most common questions I get is:

“How much solar should I put on my van, RV, or trailer?”

And my answer usually surprises people—because it’s not what they expect.

I often say:
“Get as much solar as you can afford and physically fit.”

But here’s the truth—that’s not actually the right question.


The Real Question Isn’t About Solar

Most people start their system design thinking about solar panels first. That’s backwards.

Your system does not run on solar.

It runs on battery power.

When you’re off-grid—at night, in bad weather, or parked in the shade—your solar panels aren’t doing anything. Your entire system depends on stored energy in your batteries. Solar panels simply recharge those batteries when the sun is out.

And even in ideal conditions, you’re only getting about 5–6 peak sun hours per day.


How a Solar System Actually Works

  • Battery = your fuel tank
  • Solar panels = your refueling source
  • Inverter = what makes the power usable

If your “fuel tank” is too small, it doesn’t matter how fast you refill it—you’ll constantly run out.


Start With Battery, Not Panels

So now, my answer has evolved into something much more accurate:

“Get as much battery capacity as you can afford and fit—and then size your solar to recharge it.”

Your battery bank determines:

  • How long you can stay off-grid
  • How much power you can use daily
  • Whether your system feels reliable—or constantly stressed

👉 Start with high-quality LiFePO4 batteries here:

https://solarsupplyhouse.com/collections/lifepo4-cells-and-batteries


Step One: Do a Real Power Audit

Before you buy anything, you need to understand your actual power usage.

A proper power audit includes everything you plan to run:

  • Refrigerator
  • Lights
  • Fans
  • Water pump
  • Electronics (laptops, Starlink, TVs)
  • Inverter loads (microwave, coffee maker, etc.)

Start With Your Biggest Load

Your largest power draw is usually refrigeration, because it runs 24/7.

Example:

50 watts × 24 hours = 1,200 Wh per day

That’s your baseline. From there, you add your other loads.


Example Daily Power Breakdown

  • Fridge: 1,200 Wh
  • Lights: 150 Wh
  • Fan: 300 Wh
  • Devices: 300 Wh

Total: ~2,000 Wh per day


Build Your Battery Around Your Usage

If you use 2,000 Wh/day and want 2 days of autonomy:

2,000 × 2 = 4,000 Wh battery (4 kWh)

This is where quality matters most.

👉 Explore LiFePO4 battery options here:

Shop Batteries


Now Size Your Solar to Match

If you use 2,000 Wh/day and get ~5 hours of sun:

2,000 ÷ 5 = 400W minimum solar

But real-world conditions require more:

  • Cloud cover
  • Heat losses
  • Panel angle
  • Dirt/shading

Realistic recommendation: 600–800W solar


Why This Approach Saves You Money

  • Avoid undersized systems
  • Prevent costly upgrades
  • Improve reliability
  • Reduce long-term cost

Designing around battery first means your system works in real-world conditions—not just on paper.


The Bottom Line

Solar panels don’t power your system—they support it.

Your battery is what keeps everything running.

So instead of asking:

“How much solar do I need?”

Ask:

  • How much power do I use?
  • How long do I want to stay off-grid?
  • How much battery do I need?

Then size your solar to match.


Final Thought

The best systems aren’t the biggest—they’re the ones designed correctly from the start.

If you build around your battery and your real-world usage, you won’t just save money—you’ll avoid rebuilding your system later.

Saving Money

Where, Why and When to cut corners

Solar builds—whether for RVs, vans, off-grid homes, or backup systems—have a reputation for getting expensive quickly. It’s one of the first concerns customers bring up, and understandably so. Everyone wants to save money. But when people ask me how to cut costs, my answer is often unexpected: don’t focus only on saving money today—focus on saving money over time.

That might sound counterintuitive, but in the world of solar and energy systems, short-term savings often lead to long-term expenses. The key is understanding where saving makes sense—and where it doesn’t.

The Biggest Mistake: Building for Today Only

One of the most common pitfalls I see is designing a system strictly around current needs. A customer might say, “I only need to run a few lights and charge my phone,” so they opt for the smallest, cheapest setup possible.

But fast forward six months…

Now they want to add a refrigerator, a Starlink system, or maybe even air conditioning. Suddenly, that “budget-friendly” system can’t keep up. Components need to be replaced, rewired, or upgraded—and now they’re paying twice.

This is where the real cost shows up.

A well-designed system should account for where your setup will be in one year or even five years, not just where it is today. Planning ahead doesn’t mean overspending—it means spending wisely.

Spend Once, Not Twice

There are certain areas in a solar build where cutting corners almost always backfires. These include:

  • Battery capacity
  • Inverter quality and size
  • Wiring and system infrastructure
  • Battery management systems (BMS)

For example, upgrading from a smaller battery bank to a properly sized one upfront might seem like a bigger investment. But replacing batteries later—especially after partial wear—costs significantly more.

The same goes for inverters. Buying a unit that barely meets your current needs often leads to a full replacement later. Instead, selecting an inverter with room to grow allows your system to expand without tearing everything apart.

Think of it like building a foundation. You don’t want to rebuild it every time you add a new room.

Where You Can Save Money

Now, this doesn’t mean you need to go “all out” on every component. There are smart ways to reduce costs without sacrificing long-term performance.

Here are a few areas where saving money can make sense:

1. Timing Your Purchases

Solar components fluctuate in price. Batteries, panels, and electronics often go on sale or drop in price seasonally. If your build timeline allows, waiting for the right moment can save hundreds—or even thousands.

2. Starting with Expandable Systems

Instead of overspending upfront, choose components that are designed to scale. For example:

  • Modular battery systems
  • Expandable solar arrays
  • Inverters that support additional capacity

This lets you start smaller without locking yourself into a dead-end system.

3. Avoiding Unnecessary “Premium” Features

Not every build needs top-tier, feature-heavy equipment. Sometimes you’re paying for capabilities you’ll never use. The goal is not the most expensive system—it’s the right system.

The Hidden Cost of Cheap Components

It’s important to understand that the cheapest option is rarely the best value.

Lower-cost components often come with:

  • Reduced lifespan
  • Lower efficiency
  • Poor compatibility with future upgrades
  • Limited or no support

When these parts fail—or simply can’t keep up—you’re not just replacing them. You’re often reworking the entire system around them.

That’s where hindsight gets expensive.

Real-World Experience Matters

This isn’t a sales pitch—it’s something I’ve personally experienced and seen repeatedly in the field. Customers who tried to save upfront often end up spending more in the long run. Not because they made bad decisions, but because they didn’t have the full picture of how their system would evolve.

On the other hand, customers who planned ahead—even modestly—ended up with systems that lasted longer, performed better, and required fewer costly upgrades.

The Bottom Line

Saving money on a solar build isn’t about spending less—it’s about spending smarter.

Ask yourself:

  • Where will my system be in a year?
  • What might I want to add later?
  • Will this component still work when I expand?

If the answer is no, it may not be saving you money at all.

A well-thought-out system is an investment—one that pays you back in reliability, performance, and fewer headaches down the road.

And in solar, that’s where the real savings happen.